
Step-by-Step Guide to Jailbreak iOS 4.1 for iPhone 4, 3GS and 3G Using Pwnage Tool
Just last week, iPhone Dev Team released an updated version of Pwnage Tool to jailbreak iOS 4.1 for iPhone 4, 3GS and 3G. Pwnage Tool is one of the most successful iPhone jailbreak tools ever released for jailbreakers like you. While there have been several tools like Limera1n, RedSn0w and Greenpoison, I still would recommend using Pwnage Tool because it is a lot better, easy-to-use and stable.
Let’s go straight to the procedures on how to safely jailbreak your iPhone using Pwnage Jailbreak tool.
Read This Before You Proceed:
1. Jailbreak voids warranty and this guide is published for reference only. In any case that this jailbreak may not work for your iPhone, AppleRepo.com cannot be held liable. Use this process at your own risk.
2. Pwnage Tool is for Mac users only. If you don’t have a Mac, then try to use other jailbreak tools such as Limera1n, RedSn0w and Greenpoison. Or, you can borrow a Mac from a friend to create custom IPSW firmware file and later restore it in your PC.
3. This tool is released for jailbreaking only. If you want to unlock your iPhone after jailbreak, use UltraSn0w.
4. Supported iPhone versions are iPhone 3G, iPhone 3GS and iPhone 4.
5. You can also use this tool to create custom firmware file even if you are using a jailbroken iPhone running on iOS 3.1.x and 4.0.x.
Jailbreak Process:
1. You have to make sure you are running iTunes 10 and up to perform this process. You have to sync your iPhone with iTunes so that you retrieve your SMS, applications and contacts after the jailbreak.
2. Download the files you need:
A. Download PwnageTool 4.1.2, Click Here.
B. Download iPhone 4 Firmware, Click Here.
C. Download iPhone 3GS Firmware, Click Here.
D. Download iPhone 3G Firmware, Click Here.
It is advisable you use Firefox to download these files because Safari unzips all zipped files during download.
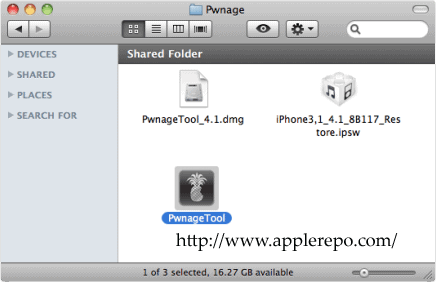
3. After you have downloaded all necessary files, launch PwnageTool_4.1.2.dmg. Copy the PwnageTool to the directory you can easily find, it is advisable you transfer it to the directory where you have download the firmware files.
4. Now, connect your iPhone to the dock or USB port. Make sure you have it connected the whole duration of the jailbreak process.
5. Navigate through the directory where you copied PwnageTool to and launch the program. There are times when the warning pops up, just click on “OK” to continue.

6. Now click on “Expert Mode“. Select “iPhone” from the options, and click on the white arrow to proceed.
7. This time around, you will be asked to browse for IPSW file or the firmware file you just downloaded. Select “Browse for IPSW” and click on the white arrow below.
8. Once you have selected the IPSW file for your iPhone, you will be brought to the PwnageTool Main Menu. Select “General” among the options and click on the white arrow.
9. You will then be brought to General Settings window wherein you will to set some things to continue with the jailbreak process. Just set the Root Partition size to 888 mb, and if you are using the official carrier, deselect the “Activate the phone” option. Click on the arrow again if you are ready.
10. The next steps will bring to several configuration windows; just keep everything to default and proceed. In other words, don’t change anything and keep on clicking the arrow until you will be brought back to the main menu. This time around, you have to select “Build” option and click next arrow.
11. This option will let you create your own custom IPSW file. After clicking on the next arrow in Step 10, you will be asked to save an IPSW file. You can use the given default filename, or you can create your own. Simply click on the “Save” button if you are ready to do so.
12. PwnageTool will now starting building IPSW file that you can use to restore your iPhone 4, 3GS and 3G. Along the process, you may be asked to enter your logon information. This process may take UP TO 10 minutes so you have to be patient.
13. The next steps will be how to put your iPhone into DFU mode. Simply follow the screenshots provided below.
14. Once your iPhone has entered DFU mode, you will be notified by PwnageTool. Click “OK” and close PwnageTool, then launch iTunes.
So far, what we have done from Step 1 to 14 are the most important. The next few steps will require us to use iTunes to complete the jailbreak process using PwnageTool.
15. Once you have launch iTunes, it will automatically detect your iPhone on DFU/recovery mode. Click on “OK” button to proceed.
16. Now hold “Option” key and click on “Restore” and follow the next step.
17. Browse through the directory where you have saved the custom IPSW file you have built a while ago. Select the file and click on the “Choose” button and iTunes will take care of the rest.
18. iTunes will then restore the firmware on your iPhone. This may take from 5 to 10 minutes. After which, iTunes will reboot your iPhone and you will see your iPhone starting up with iOS 4.1.
This jailbreak iPhone 4.1 iOS using PWnage tool guide as well as the screenshots within are actual and taken during the jailbreak process that I did on my iPhone myself. If you follow every step presented in this guide, you will have a safe and smooth jailbreak using PwnageTool. After the jailbreak, be sure to make your iPhone secure to protect it from any iPhone hack attacks.
The author likes to write about all things related to apple products