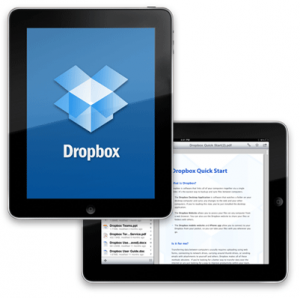
Dropbox App For Your iPad.Always forgetting to copy your important files and documents from your desktop to your iPad? Want easy transfer of files between your iPad, your iPad 2, your iPhone, and your Mac? Confused which files are located where? Then fret no more, because here comes the app that would solve your problems; and the best part of it is that it’s free! Dropbox is probably one of the most used apps today. It’s like a virtual online hard drive for your file storage needs, only better.
Different Functions of Dropbox app
Dropbox could…
- Store your files. Lost your iPad? That just sucks, but don’t worry because your files on your Dropbox folder is also stored on your desktop, and your iPhone, your Macbook, and your Dropbox account online.
- Sync your files between different gadets. You just have to store your files on one gadget, and it’s going to be available with all the gadgets that you have your Dropbox app for ipad installed.
- Swapping files with friends and workmates. Need to send a file to someone? Then you don’t need to wait until your files get attached through email. Transferring files while using Dropbox is really easy, not to mention, faster.
How to Use the Dropbox AppFor Your iPad
Now, the next question is how exactly do you own and operate the Dropbox ipad app. Read on for the step by step guide on how to use your Dropbox app.
- Visit the Dropbox homepage by clicking here.
- Create a new account and fill in the registration form. Once you’re done, click “Create Account”.
- The download will start automatically after you click on it.
- If you’re using a Mac, then a window will pop up. You have to drag this window into your Applications folder to start the installation process.
- After just a short while, the app would finish installing and it will show up in your Apps folder. Double click on the icon, and a window will pop up asking you for your password. Why? It’s just asking permission to access your Home folder. After typing in your password just click “ok”.
- After that, you would be able to see and access the Dropbox app through your toolbar.
- Click on it and you will see “Open Dropbox Folder”. A window will show up. This is the folder where you should put all of the files you want to store via Dropbox. Initially, Dropbox is going to give you 2G for free, but if you need more storage, then you could just buy 100G for $19.99 a month.
- Now, for easier access, click on the Home folder and drag your Dropbox to your “Places” in the Finder.
- The next step of course is to find the files you want to put in your Dropbox folder. You just have to drag them to your Dropbox and it will automatically upload to your online Dropbox account as well.
- After transferring your files, access your Dropbox folder. There you would see your stored files with green checks on them. It means that they have been successfully synced with your online Dropbox account.
- Now if you want to copy files from another computer that doesn’t have a Dropbox app, then simply access your online Dropbox account and upload the files you want there. When you get home, you’ll see that the files that you have uploaded from another computer a while ago to your online Dropbox account is already there as well.
- Of course you could also install the Dropbox app to your iPad as well. Install it by clicking this link. Then install it to your iPad by tapping the icon to launch the app.
- A window will show up and log in to your app using the username and password you used in registering to an online Dropbox account.
- Finally, just tap “My Dropbox” to view your Dropbox files, and just tap each file to access them. You can also now upload files from your iPad.
See in less than fifteen steps, you have made your files faster to sync and locate, and your life a whole lot easier. Do yourself a favor. Download yourself a free Dropbox app for ipad today.
Editor-in-chief in charge of reviewing an article before it is published on applerepo.com
Check Out These Too:
- How You Can Benefit from Apple's iCloud? Apple iCloud Benefits. Apple’s iCloud service is slated to be another big unfurl as far as the technological innovations are concerned. A cloud based environment enables the end users to…
- Watching Movies to your iPod Touch Do you know How to watch movies to your iPod Touch? Among all media players sold in the market today, the iPod Touch is considered one of the best. This…
- Top 15 Free iPhone Apps Top 15 free iPhone apps. Applerepo.com, The title of this article could also have been the best 15 iphone applications that you still don't have because you didn't know they…
- HOW TO INSTALL iTUNES ON WINDOWS 7? Install iTunes on Windows. With the advent of Apple’s iPod, iTunes, the music and video player for the iPod has gained immense popularity. iTunes is used to synchronise and manage…
- How to Transfer Music From Computer to iPhone How to Transfer Music From Computer to iPhone - Are you struggling with transferring music from computer to iPhone? Don't worry, we are here to help! It's a common knowledge…
- iPad Turns 2 Years Old The iPad has been credited with jumpstarting the tablet market and nobody can deny that it has been wildly successful. Today marks the official 2 year anniversary of the iPad…
- How to Sync iPad with PC-based iTunes Syncing or synchronizing iPad to the iTunes in your computer will help in retaining a backup of copy of all the important files like apps, videos, music and all types…
- Common iPad Error:"No SIM Card Installed" Since the first generation iPad was released, owners were haunted by "No SIM Card Installed" error and more often than not, we are caught unprepared. This problem is unpredictable because…
- iTunes Digital Music File Restrictions iTunes Digital Music File Restrictions - More than a few music tracks are presented to iPod users from a wide range of online resources. They are introduced and accessible by…
- Best IPad Apps for Teachers Best IPad Apps for Teachers Nowadays, the world has become highly advanced in terms of technology. Technology can now be used in different parts of the society. It has produced…
- Planning How to Connect the iPad and iPhone to Your VPN In this post, we'll look quickly at planning how the iPad and iPhone will connect to your Virtual Private Network (VPN). We'll start by reviewing the VPN technologies the iPad…
- How to Transfer Documents to iPhone Using File… Unless you use third-party apps, the most direct way to add documents to the iPad or iPhone directly is to use the File Sharing capability built into iTunes. If you…
- 4 Ways To Use MS Office On IPad Four Ways To Use MS Office On IPad. Is your iPad loaded with apps, but lacking basic Microsoft Office functionality? While you can easily fetch your email messages, pay bills,…
- Tutorial on How to Turn Off Automatic Download of… How to Turn Off Automatic Download of Apps on iPhone & iPad? - Applerepo.com, If you use the same Apple ID on multiple devices, apps automatically downloaded to all connected…
- Tips to Print and Make PDF Document From Your iPad You could print and make PDF documents for your iPad using these great 2 Pdf printer app from itunes apps store: PDF Printer App Print to PDF app was a…
- How to Back up Your iPad Owners of the iPad may have already come to realize just in the last few months, how essential the device has become for their daily tasks, and has many people…
- How to Reboot Your iPad? IPad, a line of tablet computers manufactured by Apple Inc., offers us lots of entertainment. From listening to audio files, reading digital books or electronic books, to playing games and…
- Best iPad Apps for Architects In my previous post, I shared you three of the best iPad apps for artists but now, let me share you another batch of iPad apps for architecture. Architecture is…
- WorldCard HD iPad App - Carry All Your Contacts in Your iPad WorldCard HD iPad App Review If you are a businessman, managing business contacts could be your biggest headache. You may need to carry a bunch of business cards everywhere you…
- iOS 5.0.1 Beta 2 Released for Developer Only iOS 5.0.1 Beta 2 Released for Developer Only Today Apple released the new update of IOS 5, the update is in Beta 2. This IOS 5.0.1 Beta 2 update is…
- The 4 Most Common iPad Problems and How to Solve Them The 4 Most Common iPad Problems and How to Solve Them - Apple Repo, Like any other electronic device, the iPad can present problems when executing some of its functions.…
- How to Transfer Music From IPod To Your Computer Music makes the people come together. Have you recognized that line from a song? It’s from Madonna. I totally agree with her because music unites all people from different races.…
- Where to Buy Apple iPad Online The New Apple iPad is finally here! But you've got to know that with so much hype, and months of Apple promoting the heck out of the new ipad gadget,…
- Best IPad Apps for Lawyers - Our Favorite Legal Apps… Best ipad Apps for Lawyers Admit it, iPads are one of the hottest gadgets nowadays, aren’t they? Well, here is yet another post for you. This time, I will share…
- How to Copy Content from your iPod to Your Computer One of the most commonly asked questions regarding the iPod Touch is how to transfer content from the iPod to your computer. While it's very easy to transfer data from…
- Apple Stop Selling MobileMe Software Apple announced yesterday that they would be releasing a new version of their Macbook Pro devices and this has sparked a lot of excitement for Apple enthusiasts. However, as well…
- Ibeesoft Iphone Data Recovery Review Ibeesoft Iphone Data Recovery Review by AppleRepo.com, Data loss is a common problem for all users of iPhones, whether it's a result of a mistake on the part of the…
- How to Transfer Documents from the iWork Apps on the… Usually, the easiest way to get the documents from the iWork apps on the iPad onto a PC or Mac is by using the File Sharing feature in iTunes. To…
- How to Fix Network Connection Problems on iPad? How to Fix Network Connection Problems on iPad?. Some of the most common problems of iOS devices are the problems connected to network connection. No matter what the cause is,…
- Bank of America iPad App Review Bank of America iPad App Review. Now, this is a good news for iPad user and Bank of America customers. If you are both of them, the banking giant has…


